Visual Merchandising: Overview, Principles, Strategy, Tools, Types, Mistakes to Avoid
Visual merchandising plays a pivotal role in shaping the retail experience by strategically organizing and presenting products to entice customers. It goes beyond just displaying items; it’s about creating an immersive and engaging environment that draws shoppers in, encourages exploration, and ultimately drives sales. By leveraging elements like lighting, colors, signage, and store layouts, retailers can enhance customer engagement and reflect their brand’s identity.
The effectiveness of visual merchandising can be seen in its ability to influence customer behavior. According to a study, as reported by CAAD Design, 70% of purchasing decisions are made in-store, and compelling visual merchandising can significantly increase foot traffic and sales. Key principles like balance, color theory, and storytelling help craft compelling displays, while tools such as digital signage and planograms streamline the design and execution process.
However, common mistakes such as overcrowding displays or inconsistent brand presentation can hinder the effectiveness of a merchandising strategy. Retailers must ensure that their approach remains consistent and updated, especially with seasonal shifts. The right visual merchandising strategy not only promotes specific products but also fosters a memorable shopping experience that keeps customers coming back. This comprehensive guide to visual merchandising covers its core principles, tools, strategies, types, and pitfalls to avoid for optimal retail success.
What is Visual Merchandising?
Visual merchandising is the practice of arranging products in a store to make them look appealing and encourage customers to buy. Visual merchandising is all about using displays, lighting, colors, and signs to create an attractive and organized shopping experience. The goal is to catch the eye of shoppers, show off products in the best way, and make the store feel inviting.
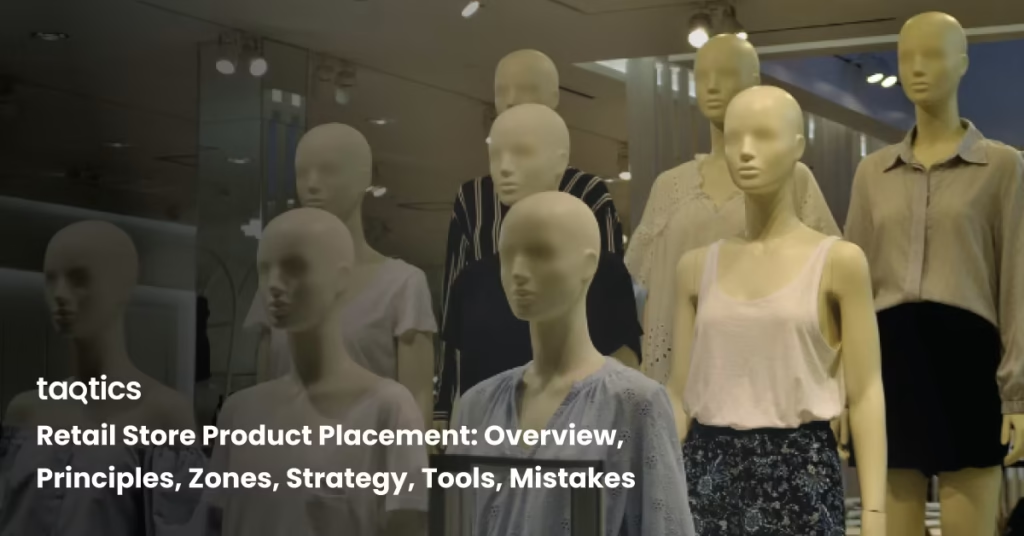
For example, imagine walking into a clothing store. You might see a mannequin dressed in the latest fashion, placed near the entrance. This is a form of visual merchandising, where the mannequin helps showcase new arrivals. Products are grouped by theme or color, making it easier for customers to find items they like. Bright lights might highlight a sale section, and signs with catchy phrases could guide customers to different areas of the store.
Visual merchandising helps create a store environment that encourages people to explore and enjoy their shopping experience, and ultimately make purchases. It’s not just about selling products but also about creating a visually pleasing and engaging atmosphere.
Why Visual Merchandising Matters in Retail?
The six major reasons why visual merchandising matters in retail are first impressions that count, exploration, increased sales, storytelling approach, enhanced shopping experience, and competitive edge.
- First Impressions Count: The first thing customers notice when they enter a store is the display and layout. A well-organized, visually appealing environment creates a positive first impression, making customers more likely to stay and shop.
- Encourages Exploration: Good visual merchandising guides customers through the store, encouraging them to explore more areas. By strategically placing products and using attractive displays, retailers can draw attention to specific items, boosting sales.
- Increases Sales: When products are displayed in an eye-catching way, customers are more likely to notice and buy them. For example, showing products in themed displays (like holiday items or seasonal promotions) can increase sales by creating a sense of urgency or excitement.
- Tells a Story: Visual merchandising allows retailers to communicate their brand and product story. The choice of colors, materials, and even lighting can convey the brand’s personality, values, and the type of experience customers can expect.
- Enhances Shopping Experience: A visually pleasing store makes shopping more enjoyable and less stressful. Well-designed spaces help customers easily find what they’re looking for, reducing frustration and making them more likely to return.
- Competitive Edge: In a crowded retail market, great visual merchandising can help a store stand out from competitors. It’s a powerful tool for attracting foot traffic and creating a memorable experience that keeps customers coming back.
With effective visual merchandising, drawing customers in, encouraging sales, and enhancing their overall shopping experience becomes smoother. It’s more than just organizing items on shelves. Instead, it’s about creating an experience that attracts, engages, and convinces customers to make a purchase.
What are The Core Principles of Visual Merchandising?
The five core principles of visual merchandising help create an engaging and organized shopping experience.
1. Balance, Symmetry, and Focal Points
Balance ensures that the store’s layout feels visually appealing and stable. Symmetry refers to arranging items evenly on either side, which creates a sense of harmony. Asymmetry can also be used to create visual interest. Focal points are areas in the store that draw attention, like a special product display. Creating focal points, such as a mannequin with the latest fashion or a featured product, helps guide customers’ attention to key items and promotes sales.
2. Color Theory and Psychological Triggers
Colors can evoke emotions and influence buying behavior. For example, red is often used to encourage excitement and impulse buying, while blue creates a sense of calm and trust. Retailers use color combinations strategically to set the mood and draw attention to specific products. Warm colors like yellow and orange attract attention, while cooler tones like green and purple can create a more relaxed environment.
3. Storytelling Through Displays
Displays are a way to tell a brand’s story and showcase how products can fit into a customer’s lifestyle. For instance, a display for outdoor gear might include a backdrop of mountains and use props like backpacks and tents to create a narrative. This storytelling element helps customers connect emotionally with products, making them more likely to buy.
4. Use of Lighting, Textures, and Props
Lighting highlights certain products, creating mood and emphasizing key areas. Textures, like soft fabrics or rough wood, can make the store environment feel inviting. Props like decorative items or seasonal elements add character to the display, making it more engaging and relatable.
5. Consistency with Brand Identity
All visual elements, including colors, displays, lighting, and props, should align with the brand’s identity. Consistency helps reinforce the brand’s message and builds customer trust, ensuring they recognize the store’s personality and values.
By using these principles, retailers can craft a compelling, memorable shopping experience that encourages customers to make purchases.
How to Create Visual Merchandising Strategy?
To create an effective visual merchandising strategy, you can follow four crucial steps.
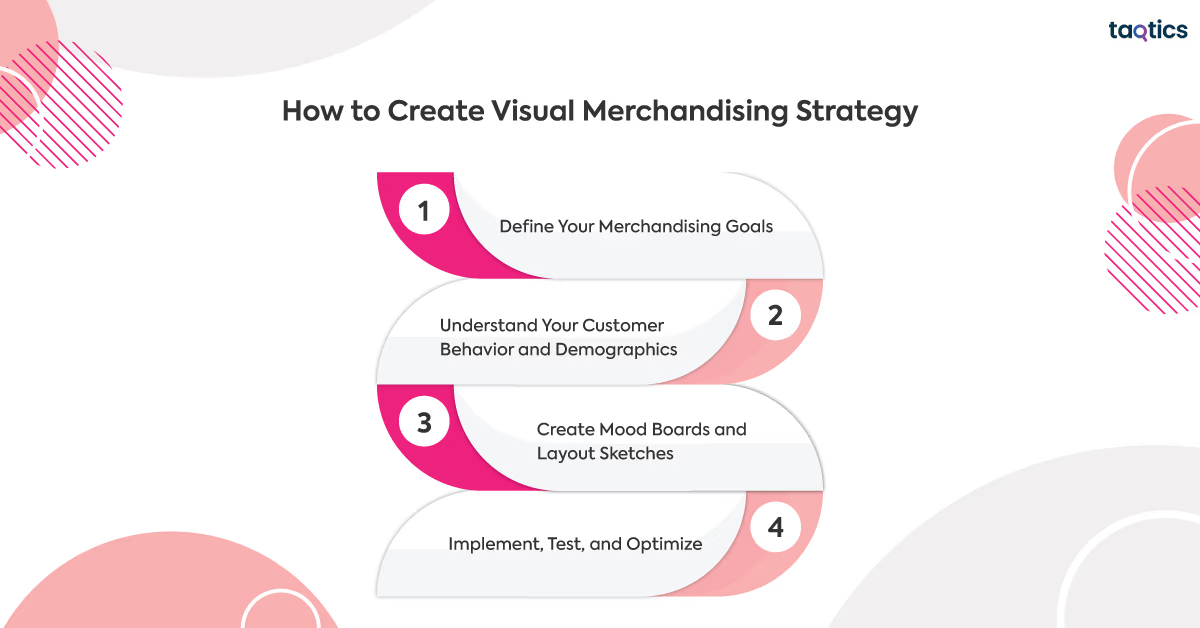
Step 1: Define Your Merchandising Goals
The first step is to establish clear goals for your visual retail merchandising strategy. What do you want to achieve? Is it to increase foot traffic, promote a new product, or boost sales during a specific season? Your goals will guide the design and layout of your store. For example, if you want to promote a sale, your strategy might involve highlighting discounted items at the front of the store with eye-catching displays. Clear goals ensure that all your merchandising efforts are focused and measurable.
Step 2: Understand Your Customer Behavior and Demographics
To design an effective merchandising strategy, you need to understand your target customers. This includes their shopping habits, preferences, age group, lifestyle, and buying behavior. For example, if your target market is young professionals, your displays might focus on sleek, modern designs and emphasize convenience. Understanding customer demographics helps you create displays that appeal to their specific needs, which can drive sales and improve the customer experience.
Step 3: Create Mood Boards and Layout Sketches
Mood boards and layout sketches help bring your ideas to life. A mood board is a visual representation of the style, colors, textures, and themes you want to incorporate into your displays. It helps to visualize the overall look and feel of the store. Layout sketches are practical tools that map out the store’s flow and product placement. These tools ensure that your displays are visually cohesive and guide customers naturally through the space.
Step 4: Implement, Test, and Optimize
Once the design and plan are in place, it’s time to implement the strategy. Set up your displays, adjust lighting, and organize products according to your plan. Afterward, test how the displays perform—are customers engaging with the products? Are sales increasing? Collect data and feedback to assess what works and what doesn’t. Based on this, you can optimize your displays and fine-tune elements like product placement, colors, or lighting to improve results continuously.
You can create a visual merchandising strategy aligned with your goals, tailored to your customers, and adaptable to changes for maximum impact.
What Tools are Necessary for Visual Merchandising?
Creating an effective visual merchandising strategy requires the right visual merchandising software tools to streamline design, implementation, and analysis. Below are some essential tools for visual merchandising:
1. Planogram and Store Layout Software
Planogram software is a powerful tool used to design the layout of a store and optimize product placement. It helps visualize how shelves, displays, and products should be arranged for maximum customer engagement. This software provides detailed plans, ensuring that products are displayed in the most effective way. These tools help maintain consistency in product positioning across different store locations. Taqtics offers visual merchandising execution tools that allow retailers to design and implement detailed planograms, ensuring effective in-store execution and alignment with strategic goals.
2. AR/VR Tools for 3D Visualization
Augmented Reality (AR) and Virtual Reality (VR) tools are increasingly being used in visual merchandising to provide immersive 3D visualizations of store layouts and displays. These tools allow retailers to design and test store setups digitally before physically setting them up. With AR/VR, store owners can experiment with various design ideas, ensuring they select the most effective layout without the risk of costly mistakes.
3. Digital Signage Platforms
Digital signage platforms are used to display dynamic content, such as promotions, advertisements, or store information. These digital screens can be placed at key locations throughout the store to engage customers, highlight offers, and guide them to specific sections. Digital signage can be easily updated in real-time, providing flexibility for ongoing promotions and seasonal changes.
4. Retail Analytics and Heat Mapping Tools
Retail analytics tools track customer behavior within the store, providing valuable data on which areas attract the most traffic and how customers interact with displays. Heat mapping tools, in particular, visualize customer movement and show hot spots, helping retailers optimize product placement. Tools like Taqtics can help identify high-traffic areas and improve in-store experiences by ensuring displays are strategically placed for maximum visibility.
Together, these tools help retailers plan, execute, and continuously optimize their visual merchandising strategies to enhance customer experience and drive sales.
What are The Types of Visual Merchandising in Retail?
There are five major types of visual merchandising in retail designed to enhance customer experience and boost sales.
1. Window Displays
Window displays are one of the most effective ways to attract customers from outside the store. They serve as the first impression of the store and can draw people in with eye-catching themes, seasonal promotions, or creative arrangements. A well-designed window display highlights key products and sets the tone for what customers can expect inside. For example, a holiday window display might feature festive decorations, mannequins dressed in seasonal clothing, and illuminated items to create a captivating, festive atmosphere.
2. In-store Displays
In-store displays are strategically placed throughout the store to catch customers’ attention and encourage them to explore or purchase. These displays can be standalone or part of an overall store layout to enhance in-store customer experience. Examples include end-cap displays, product tables, or thematic sections. In-store displays help feature specific products, often promoting new arrivals, seasonal items, or sales, and can be designed with props, lighting, and signage to enhance the product’s appeal.
3. Product Zoning and Layout
Product zoning involves grouping related products in specific areas of the store. This zoning makes it easier for customers to find items they are looking for and encourages cross-selling. For example, a beauty store might zone skincare products in one section, makeup in another, and fragrance in a separate zone. Effective product zoning guides customers through the store and helps increase purchase frequency by highlighting complementary items.
4. Shelf and Signage Merchandising
Shelf merchandising refers to the arrangement of products on shelves to make them easy to browse and visually appealing. Signage, including electronic shelf labels for retail pricing, plays a key role in this by providing helpful information such as prices, promotions, and product benefits. Clear, well-positioned signage can drive traffic to specific areas and highlight key items, making the shopping experience smoother.
5. Digital Signage and Sensory Merchandising
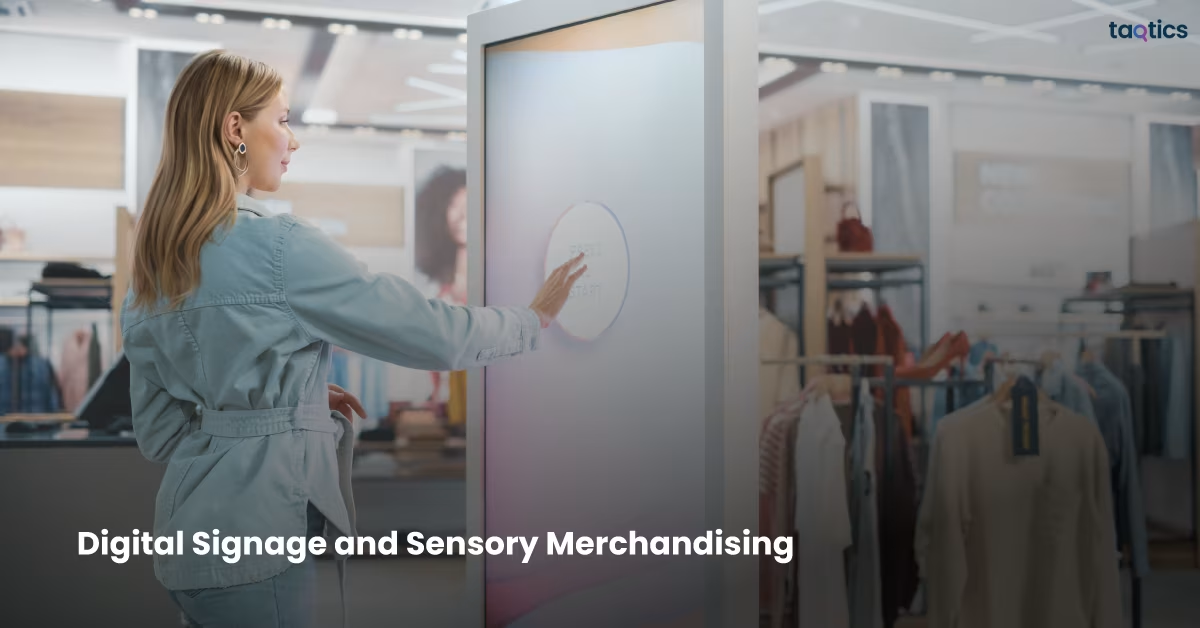
Digital signage includes the use of screens to display dynamic content like promotions, ads, or store information. It engages customers with vibrant visuals and real-time updates. Sensory merchandising enhances the shopping experience by appealing to senses other than sight, such as smell, sound, or touch. For example, a store might use background music, ambient lighting, or scent diffusers to create a memorable and engaging shopping environment.
These types of visual merchandising techniques help create a well-rounded, engaging shopping experience that draws in customers and encourages purchases.
What are The Popular Visual Merchandising Techniques?
The popular visual merchandising techniques are essential for creating a compelling shopping experience and guiding customers toward making purchases.
1. The Rule of Three and Pyramid Technique
The Rule of Three is a design principle that suggests grouping products in sets of three for a balanced, visually appealing display. This technique works because odd numbers (especially three) are more engaging and dynamic. The pyramid technique is related, where products are arranged in a triangular or stacked shape, drawing the eye upwards and creating visual interest. This arrangement often leads to a natural flow of attention from the base to the top, highlighting key products in an organized, harmonious manner.
2. Creating a Clear Path and Customer Journey
Effective visual merchandising ensures that customers can navigate the store easily. By creating clear pathways and guiding customers through different sections, retailers can control the flow of traffic and highlight specific areas. This customer journey involves placing high-interest products at key locations, such as near the entrance, at the end of aisles, or around corners, where customers are likely to be drawn in. This strategy encourages exploration and boosts sales as customers are led through carefully curated displays.
3. Using Mannequins and Product Groupings
Mannequins are powerful tools for showcasing how products look in real life, especially in fashion stores. They help customers visualize how clothing can be styled or how accessories complement outfits. Similarly, product groupings create a story or theme, helping customers see how different items work together. For example, grouping shoes, bags, and scarves in a cohesive display allows customers to imagine themselves with a complete look, encouraging them to purchase multiple items.
4. Seasonal Themes and Timely Updates
Seasonal themes and timely updates are key to keeping the store fresh and relevant. For example, a winter-themed display featuring coats, scarves, and boots will attract attention during the colder months. Updating displays to reflect holidays, events, or seasonal changes not only keeps the store looking current but also taps into customer anticipation, encouraging purchases.
5. Highlighting High-margin or Promotional Products
Strategically placing high-margin or promotional products in prominent areas, like the front of the store or near checkout, can increase visibility and drive sales. These products are typically priced higher or on sale, and their placement encourages customers to make impulse buys. Special signs or lighting can be used to draw further attention to these items.
By utilizing these techniques, retailers can craft a visually engaging store environment that not only attracts customers but also guides them toward making purchases.
What are The Common Mistakes to Avoid in Visual Merchandising?
The common mistakes to avoid in visual merchandising include overcrowded displays, poor lighting, no clarity in messages or signages, no seasonal updates, and inconsistent brand presentation.
1. Overcrowding Displays or Poor Lighting
Overcrowded retail displays can overwhelm customers and make it difficult for them to focus on individual products. When too many items are packed into a small space, the display loses its visual appeal, and customers may feel confused or frustrated. On the other hand, poor lighting can make even the most attractive products look dull and unappealing. Proper lighting is crucial for highlighting key items and creating a welcoming atmosphere. Always ensure that displays are well-lit, with a clear focus on the products you want to emphasize.
2. Lack of Clear Messaging or Signage
Signage and messaging are essential to guiding customers and communicating key information. Without clear signage, customers may struggle to find what they’re looking for or understand promotions and offers. Signage should be simple, legible, and strategically placed so that it directs shoppers to important sections or products. Too much text or cluttered signage can confuse or overwhelm customers, so clarity and simplicity are key.
3. Ignoring Seasonal Updates
Failing to update displays for seasonal changes or upcoming holidays can make a store feel outdated and disconnected from current trends. Customers expect to see relevant, seasonal products, whether it’s summer clothing, Christmas decorations, or back-to-school supplies. Regularly refreshing your displays to reflect the season keeps the store feeling fresh and ensures that you’re showcasing products that are timely and in demand.
4. Inconsistent Brand Presentation Across Locations
Inconsistent branding across different store locations can confuse customers and diminish brand identity. Every store should reflect the same visual style, colors, and messaging to create a unified experience. Whether it’s the use of logo placement, color schemes, or display arrangements, consistency in visual merchandising strengthens brand recognition and customer loyalty.
By avoiding these common mistakes and managing seasonal inventory: strategies for retailers, retailers can ensure that their visual merchandising strategies effectively attract customers, drive sales, and enhance the overall shopping experience.
About the Author